Have you already tried to install a Sitecore module package in a Sitecore instance running on Azure Kubernetes Service or in your local containerized environment? If you have, you probably already know that the installation process fails, because the application user identity doesn’t have the permission to write the uploaded module package in the packages data folder. The Sitecore documentation describes the recommended approach to add a Sitecore module to the images of a containerized solution using the module asset images, and this approach works well for a development environment where external services (SQL server, Solr, Redis) run in containers. But for a production environment running in Azure Kubernetes Service, the external services will likely not run in a container but they will use PaaS or IaaS resources instead, like for example databases running in an Azure SQL Server elastic pool resource. In this production-like scenario, a different solution is required to deploy data assets of a module to an existing external service layer and this solution consists in using data initialization containers that run in Kubernetes initialization jobs. In this blog post I will share my learnings about initialization jobs and data initialization containers and the steps needed to deploy a Sitecore module to an existing Sitecore instance running on Azure Kubernetes Service.
The Kubernetes Init Jobs
A Kubernetes job is a type of workload that can be used to execute a specific task inside a running pod. Depending of the job configuration, a job can create one or more pods using the defined image in their specifications. The particular task that a pod executes is defined in their image as entrypoint command.
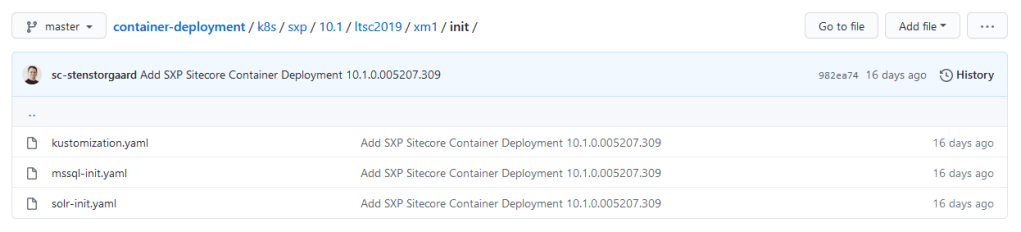
Starting from Sitecore 10.0, Kubernetes deployment specification files are officially distributed on the Sitecore Downloads website. The same resources are also officially maintained in the Sitecore Container Deployment GitHub repository. The specification files for the init jobs are available in the init folder under each topology, like for example here for the XM1 topology.
The init jobs specification yaml files set the image used to create the pod containers, the needed environment variables (mostly secrets) and the retry backoff limit. If a pod fails to run, the job will retry and create a new pod until its execution is successfully completed or if the maximum number of retries (backoff limit) is reached.
When a job completes, its pods are not automatically deleted. This can be useful to review their logs to verify the execution of their task.
The Data Initialization Containers: mssql-init and solr-init
Sitecore refers to the images used by the Kubernetes initialization jobs as data initialization containers. The official Sitecore Container registry distributes only base data initialization images for mssql and solr external services for the base Sitecore topologies, the ones that don’t have any Sitecore module already installed:
- scr.sitecore.com/sxp/sitecore-xm1-mssql-init
- scr.sitecore.com/sxp/sitecore-xm1-solr-init
- scr.sitecore.com/sxp/sitecore-xp1-mssql-init
- scr.sitecore.com/sxp/sitecore-xp1-solr-init
If you are looking to deploy a clean Sitecore solution on AKS with specific modules (like for example SXA), you will need to build your own mssql-init and solr-init images. The Sitecore Docker-Images repository provides the build specifications to build mssql-init and solr-init images for the most common Sitecore modules in different variants (SPE, SPE+SXA, SXA+JSS,…). The full list of tags of images both distributed on the official Sitecore Container Registry and of community images (the ones that can be built in the Sitecore Docker-Images repository) are listed here.
Before building my custom data initialization images, I wanted to understand what each base data initialization container does when it starts. An easy way to explore a container is to run an image in interactive mode. If the image has an entrypoint command though, that command needs to be overridden using an --entrypoint parameter in the docker run command, like in this example to start a Powershell session:
docker run -it --entrypoint "powershell.exe" scr.sitecore.com/sxp/sitecore-xm1-solr-init:10.1-2004If the internal starting command is not overridden, the starting scripts in the data initialization containers will fail to execute and the containers will stop.
mssql-init
The base mssql-init container is mainly responsible to create the Sitecore SQL databases. This container executes the StartInit.ps1 powershell scripts when it starts. The script is stored in the C:\ internal root folder of the container. This script executes the following sub-tasks invoking other Powershell scripts in the following order:
- DeployDatabases.ps1 – This script is invoked to deploy dacpacs of Sitecore databases listed in the image internal resources folder (
c:\resources). The script supports also the creation of the databases in a SQL elastic pool. - InstallShards.ps1 – This script is executed in the base data initialization mssql-init images for XP topologies only and it is responsible to create xDB collection databases shards.
- SetDatabaseUsers.ps1 – This script is invoked to set the user credentials for all Sitecore databases.
- SetSitecoreAdminPassword.ps1 – This script is the last to be invoked and it sets the Sitecore Admin user password in the Sitecore Core database.
solr-init
The base solr-init container is responsible to create the collections (and their cores) for all needed Sitecore indexes for a specific topology in a Solr Cloud service. This container executes the Start.ps1 powershell scripts when it starts. The script is stored in the C:\ internal root folder of the container and executes these sub-tasks in the following order:
- Check if Sitecore Solr collections already exist – The script starts with gathering the information needed to access the Solr service (Solr credentials and connection string) and checking if any Sitecore Solr collection already exists. The needed Sitecore Solr collections are listed parsing the
cores*.jsonfiles stored in the internalC:\datafolder. Important to note is that the script stops if at least one of the needed collections already exists in the Solr service and you will see this message (with a typo) in the container logs:Sitecore collections are already exist. Use collection name prefix different from 'sitecore'. - Download and Patch the Solr configset – If no Solr collections exist, the script downloads the default configset from the Solr service and patches it using the xslt transformation stored in the
C:\data\xsltfolder. - Create Solr collections – The final step of the script creates new Solr collections for all Sitecore Solr indexes needed by a specific topology, with a specific replication factor and number of shards that the Solr Cloud instance requires.
Building Custom Data Initialization Containers
In order to deploy the data assets of a Sitecore module to an existing Sitecore AKS instance, we need to build custom data initialization containers and use them in the Kubernetes initialization jobs. As I mentioned before, the Sitecore Docker-Images repository contains examples of Dockerfile build specifications for data initialization images for main Sitecore modules, like SXA or JSS, that use the data initialization images distributed on the official Sitecore Container Registry as their base images. Their build specifications don’t define any starting command though, so the entrypoint script defined in their base images will be executed when they run. We want to override this starting command instead, otherwise the starting script for the mssql-init container will fail when trying to install the shards again or the solr-init container will skip the new collection creation process because other collections already exist.
The majority of Sitecore modules have custom Sitecore items that need to be installed alongside with their files in a Sitecore instance, but very few of them will require to create custom Solr indexes too. Let’s then see how to build a custom mssql-init data initialization container, starting from its build specifications. This solution creates a data initialization image for a specific module. If more than one module needs to be installed, each module will have its own data initialization image.
The Dockerfile will have few steps:
- The first step will consist in copying the module database resources (in dacpac format) from the module asset image to a local resource folder, different from the pre-existing
C:\resourcesfolder, for example a sub-folder. A different folder will avoid to deploy again the dacpac database files of a clean Sitecore instance and limit the scope of the deployment job to the module resources only. - The second and final step will consist in defining the overriding
ENTRYPOINTcommand that will be executed when the container runs. This will run theDeployDatabases.ps1internal script specifying the custom resource folder where the module database assets were copied as-ResourcesDirectoryparameter value, and other needed paramaters to specify the SQL Server and its admin credentials and to skip the SQL server to start.
The Dockerfile build specification file of the custom mssql-init data initialization container will be like the following one:
# escape=`
ARG BASE_IMAGE
ARG MODULE_ASSETS

FROM ${MODULE_ASSETS} as module_assets

FROM $BASE_IMAGE as final

ARG MODULE_NAME

SHELL ["powershell", "-Command", "$ErrorActionPreference = 'Stop'; $ProgressPreference = 'SilentlyContinue';"]

COPY --from=module_assets C:\module\db c:\resources\$MODULE_NAME

ENTRYPOINT .\DeployDatabases.ps1 -ResourcesDirectory c:\resources\$env:MODULE_NAME -SqlServer $env:SQL_SERVER -SqlAdminUser $env:SQL_ADMIN_LOGIN -SqlAdminPassword $env:SQL_ADMIN_PASSWORD -SkipStartingServer
This image will require these three build arguments:
- BASE_IMAGE – The tag of the base mssql-init official Sitecore image.
- MODULE_ASSETS – The tag of the module assets image, ideally publicly distributed by the owner of the module, or custom built using a WDP package of the module.
- MODULE_NAME – The name of the module and it should not contain any space.
Additional customizations
The DeployDatabases.ps1 script doesn’t currently support the ability to specify the name of the existing Sitecore SQL databases that will likely be different than the ones that are created during a clean Sitecore installation. This script should be enhanced to support the ability to specify prefix and suffix values of the databases names. Hopefully this missing capability will be added in future Sitecore releases, since the same approach is already available in the Start.ps1 script of the solr-init container.
If you want to use a custom version of the DeployDatabases.ps1 script, you can copy your custom script in the C:\ root folder adding a COPY step in your Dockerfile before the final entrypoint step (that will need to invoke your custom script instead):
COPY .\CustomDeployDatabases.ps1 C:\\Steps to Install a Module to an Existing Sitecore Instance on AKS
In this last section, I am going to list and describe the main steps of the installation process of a module to an existing Sitecore instance running on AKS. The module that I chose to install is the Sitecore Forms Extensions (SFE) module, a popular Sitecore module developed by Bart Verdonck. My custom solution is based on the Sitecore custom-images example contained in the docker-examples Sitecore repository. The supporting code for this example is available in the addmodule branch in my forked repository here.
Step 0 – Build the module assets image (if needed)
If the assets image of the module is not distributed on a public container registry, you will need to build it by yourself. Árvai Mihály has a great blog post that describes this build process in details here. For the Sitecore Forms Extensions module, the assets image is publicly distributed on Docker Hub and this step is not needed for this module.
Step 1 – Add the module assets to the images of the custom solution
For this step I recommend to follow the official Sitecore documentation described here. Bart Verdonck described the needed step for the SFE module on his blog here too. The module assets need to be added to the cm and cd images. They should be added to the mssql image to deploy the module database assets to the local containerized development environment, but this is not strictly needed for the module deployment to a Sitecore instance on AKS.
Step 2 – Build the mssql-init image for the module
Using the Dockerfile for the custom data initialization mssql-init container described before, I built a custom mssql-init image for the SFE module and pushed it to my Azure Container Registry resource that my existing AKS cluster has access to.
An easy way to build this image is to add this Dockerfile in the code repository of my custom solution (like here) and define a separate docker-compose file for the data initialization containers that can be used in the docker-compose build command on demand, as follows:
version: "2.4"

services:

  mssql-init-sfe:
    image: ${REGISTRY}${COMPOSE_PROJECT_NAME}-xm1-mssql-init-sfe:${SFE_VERSION}-${SITECORE_VERSION}
    build:
      context: ./docker/build/mssql-init
      args:
        BASE_IMAGE: ${SITECORE_DOCKER_REGISTRY}sitecore-xm1-mssql-init:${SITECORE_VERSION}
        MODULE_ASSETS: bverdonck/sitecore-forms-extensions-assets:${SFE_VERSION}
        MODULE_NAME: sfe
    scale: 0
Build the image with the following command:
docker-compose -f .\docker-compose.init.yml buildAnd finally, push the built image to the ACR resource:
docker push mycontainerregistry.azurecr.io/mycustomsolution-xm1-mssql-init-sfe:3.2.1-1809-10.0-ltsc2019Step 3 – Build the images of the custom solution
Build the images of the custom solution using your existing build CI/CD pipeline. If you don’t have one yet, I described my build pipeline on Jenkins CI/CD tool here. You can also build your images locally using the docker-compose build command and push them to your remote container registry using the docker push command.
Step 4 – Deploy the mssql-init job specification to the AKS cluster
Using the Kubernetes CLI (kubectl), deploy a custom version of the mssql-init job specifications to the existing AKS cluster using the custom mssql-init image built at step 2. Use a copy of the mssql-init job specification file distributed in the Sitecore container deployment repository. Edit the image to use and add the definition of a new environment variable, called MODULE_NAME, with the name of the module (for example sfe). I renamed my edited copy and added it to my solution repository here.
The custom mssql-init job specification can be deployed with the following command from the custom-images root folder of my solution:
kubectl apply -f .\k8s\init\mssql-init-sfe.yaml -n sitecoreStep 5 – Deploy the images of the custom solution to the existing AKS cluster
Deploy the images of the custom solution using your existing deploy CI/CD pipeline. If you don’t have one yet, I described my deploy pipeline on Jenkins CI/CD tool here. You can also manually update the deployment specifications for the cm and the cd deployment workloads using the Kubernetes CLI (kubectl).
At the end of this process, if all steps have succeeded, the module will be successfully installed and available in the Sitecore instance running on AKS.
Conclusions
In this blog post I described an approach to deploy a Sitecore module to an existing Sitecore instance running on Azure Kubernetes Service with external services hosted outside the cluster using PaaS resources. If you have any questions, please don’t hesitate to reach out or comment on this post.
Thank you for reading!
